Note: The illustrations presented in this guide are based on the phone version of the app. The tablet version is equivalent.
App Usage
Adding a location
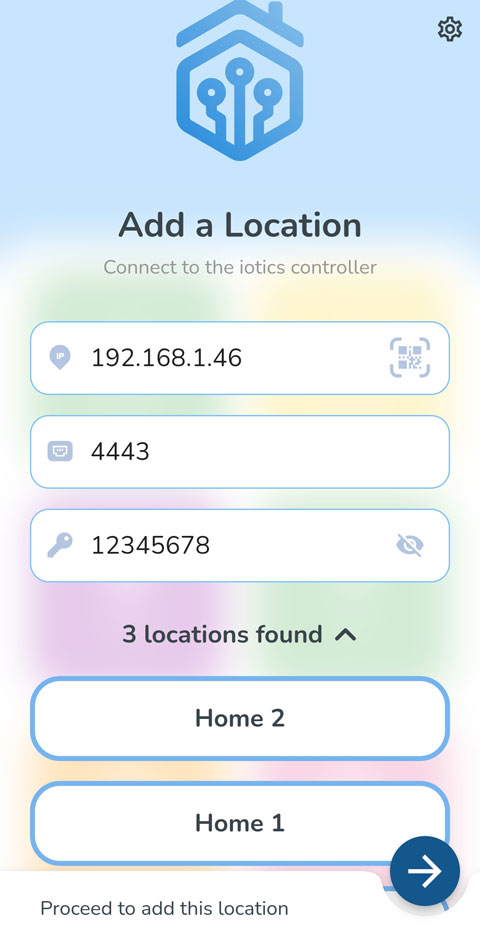
Upon initial launch, you’ll be prompted to connect to your Iotics Controller. Enter the following details:
- IP Address: Enter the IP address of your Iotics server.
- Port: The default port is 4443, but you can customize this if needed.
- Access Key: Enter the unique access key provided for your server to securely connect.
The app will automatically search for available locations associated with your Iotics Controller. Once found, you’ll see a list of available locations.
- Select a Location: Choose a location from the list (e.g., “Home 1” or “Home 2”) and tap the arrow button to proceed.
Viewing Your Locations
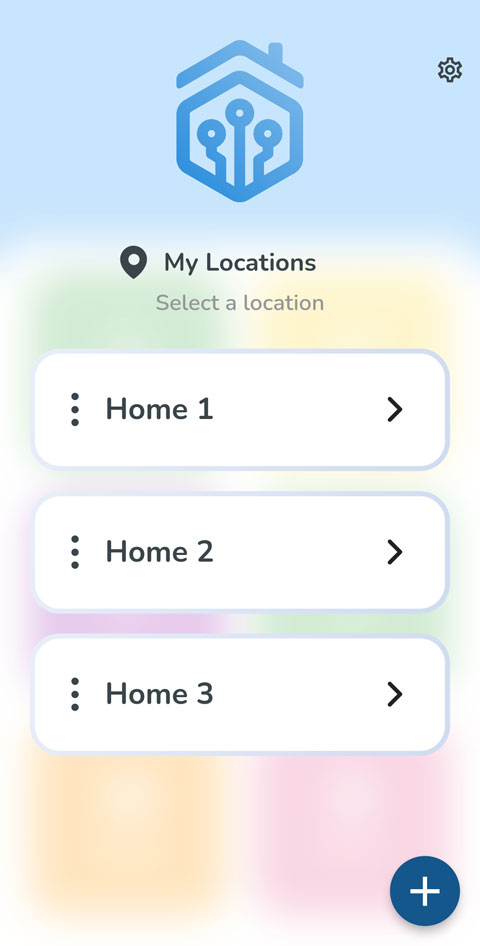
After adding a location, you’ll land on the My Locations screen, where all saved locations are displayed.
From here, you can select a specific location (e.g., “Home 1,” “Home 2”) by tapping on it. This brings up the user selection screen associated with that location.
If you wish to add more locations, tap the + button at the bottom of the screen and follow the same process as in Step 1.
Selecting a User Profile
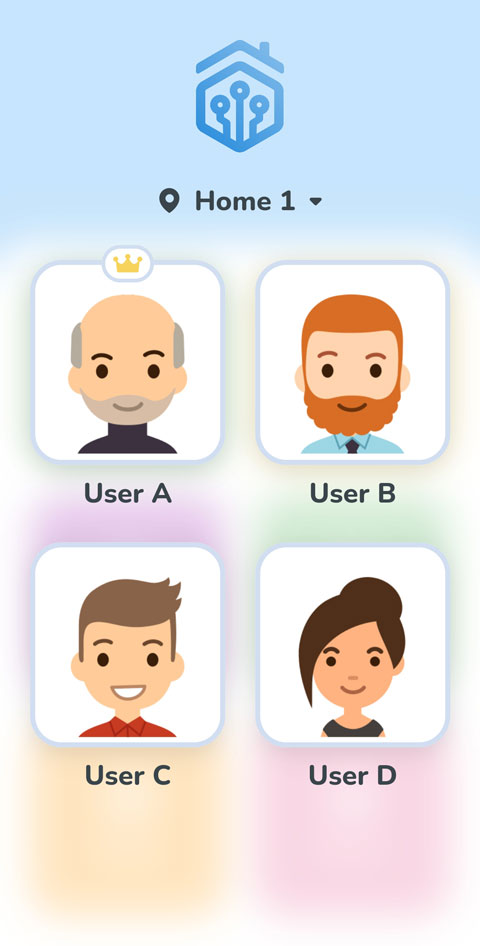
After choosing a location, you’ll see a list of user profiles set up for that location. Each user is displayed with their profile image and name (e.g., User A, User B).
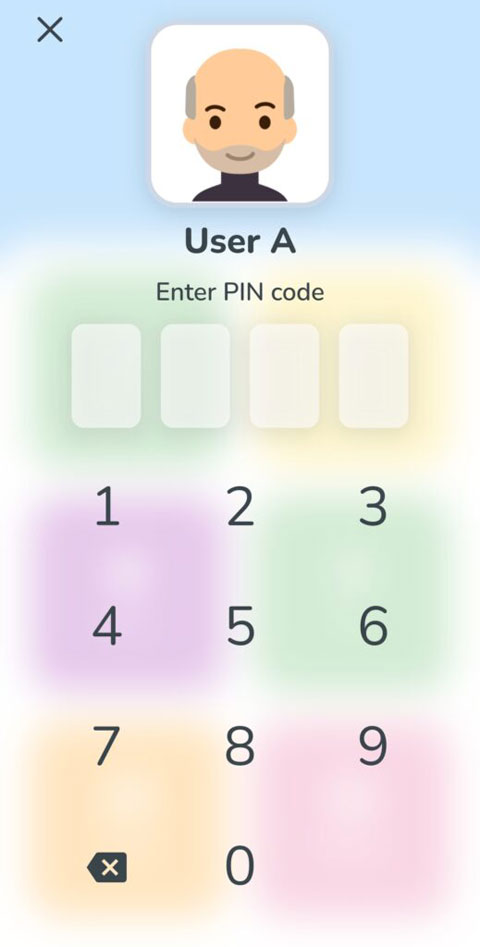
Tap on your user profile to proceed. This will bring up a secure PIN entry screen, ensuring that only authorized users can access location controls and settings.
Entering the User PIN
To access the location, enter your unique PIN code on the provided keypad.
This PIN protects user privacy and ensures that only authorized users can view and manage devices in the chosen location.
Once you’ve successfully entered the PIN, you’ll gain full access to the Iotics dashboard, where you can view and control devices, set up automations, check notifications, and monitor activity.
Configuring a user
Once logged into the Iotics Companion App, you can easily manage user profiles, set permissions, and customize user settings. Follow the steps below to configure a user.
Accessing the Main Menu
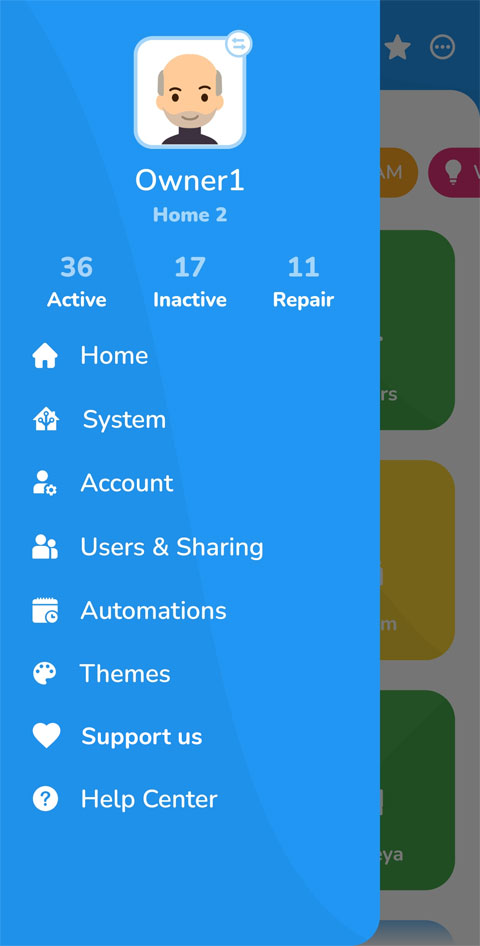
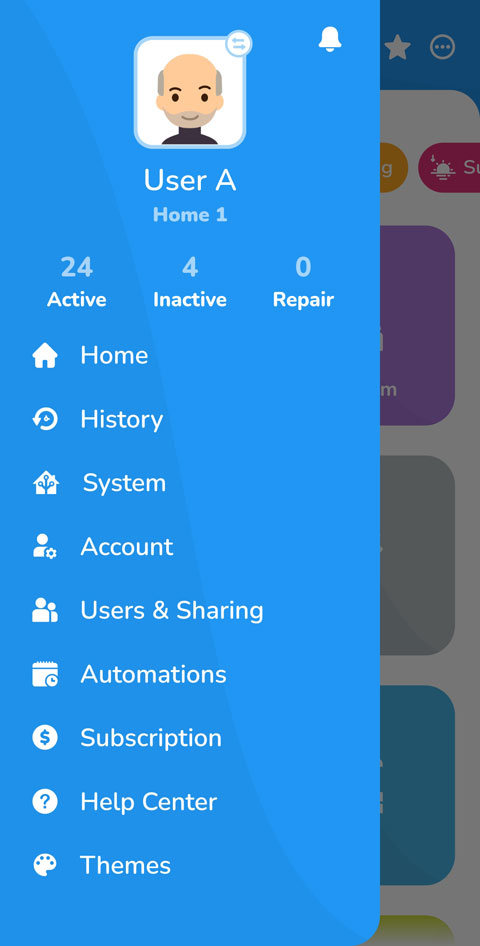
From the home screen, tap on your profile icon or swipe to open the main menu.
Here, you’ll see various options like Home, History, System, Account, Users & Sharing, Automations, Subscription, Help Center, and Themes.
Navigating to Users & Sharing
To manage users, select Users & Sharing from the main menu.
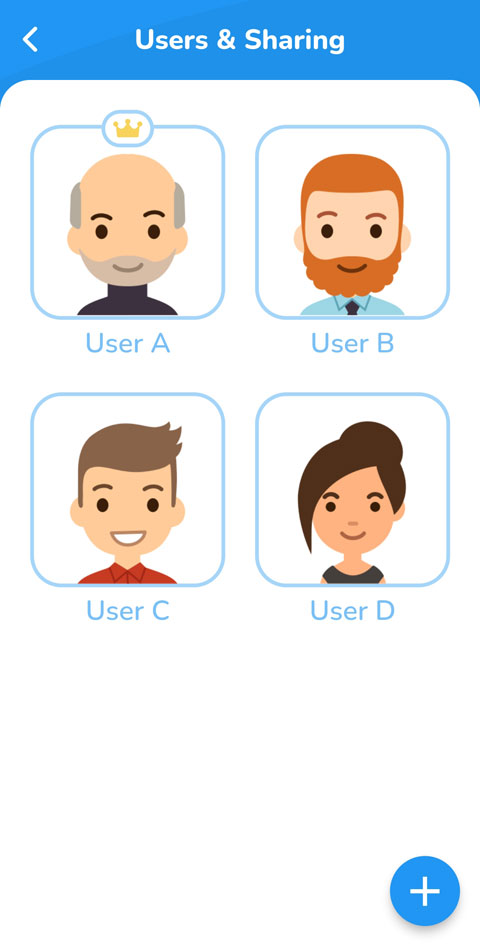
This will open a screen showing the list of users associated with your location (e.g., User A, User B, User C, and User D).
Each user is displayed with a profile image and name, making it easy to identify each profile.
Adding a New User
To add a new user, tap the + button at the bottom of the Users & Sharing screen.
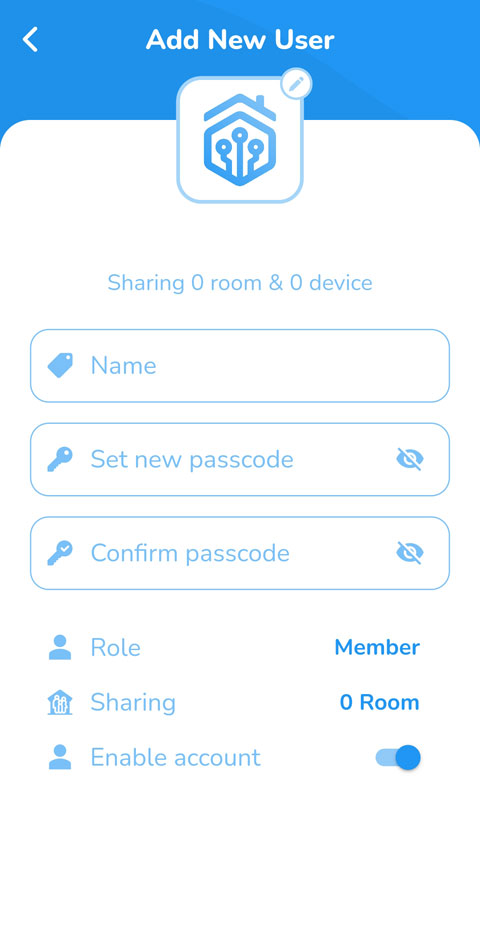
This will open the Add New User screen where you can enter the following details:
- Name: Enter the name of the new user.
- Passcode: Set a secure passcode for the user, which will be required for accessing the location.
- Confirm Passcode: Re-enter the passcode to confirm.
- Configure additional settings:
- Role: Assign the user a role, such as “Member” or “Guest,” depending on their access level. Refer to the table below for role descriptions.
- Sharing: Select the rooms and devices the user will have access to.
- Enable Account: Toggle this switch to activate the user’s account.
Role descriptions:
| Role | Description | Privileges |
| Owner | Full access to all Iotics setup and management features. | – Full control over the Iotics setup – Ability to configure settings – Manage users – Access all features and settings |
| Member | Standard access for household members to interact with assigned devices. | – Control over assigned devices – Ability to monitor and interact with the system – No access to user management or configuration settings |
| Guest | Temporary or limited access to specific devices as defined by the owner. | – Limited access to specific devices – No configuration privileges – No access to sensitive information |
Editing an Existing User Profile
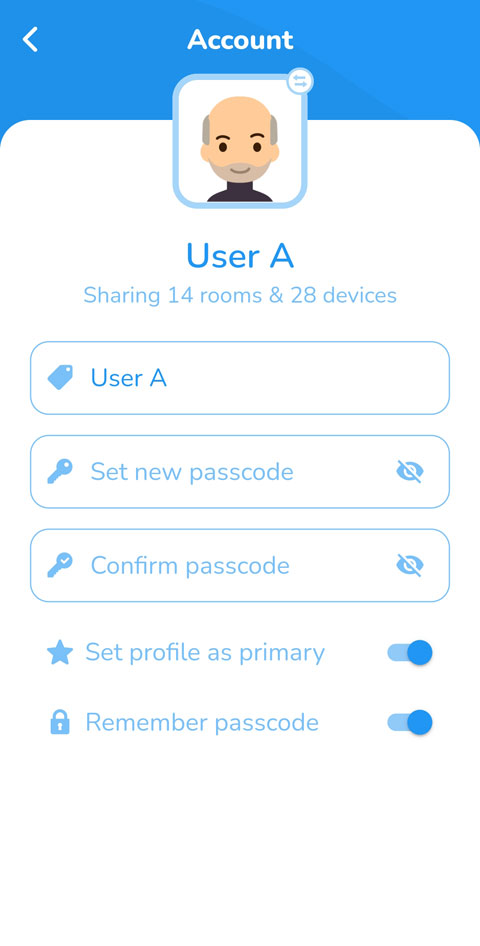
To edit an existing user, tap on their profile in the Users & Sharing screen. You’ll be taken to the Account screen, where you can modify user details:
- Name and Passcode: Edit the user’s name and update their passcode if needed.
- Set Profile as Primary: Toggle this option to set the profile as the primary user for the location.
- Remember Passcode: Enable this setting if you’d like the app to remember the passcode for quicker access.
Customizing the User Avatar
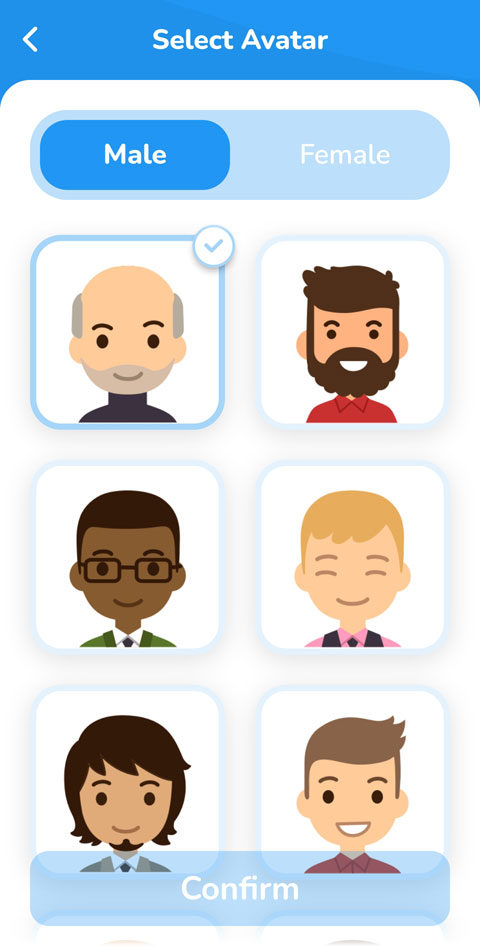
To personalize the user’s profile, tap on the avatar icon in the Account screen. This will open the Select Avatar screen where you can choose from a range of avatars categorized by male and female options. Once you’ve selected an avatar, tap Confirm to save the changes.
Configuring a location
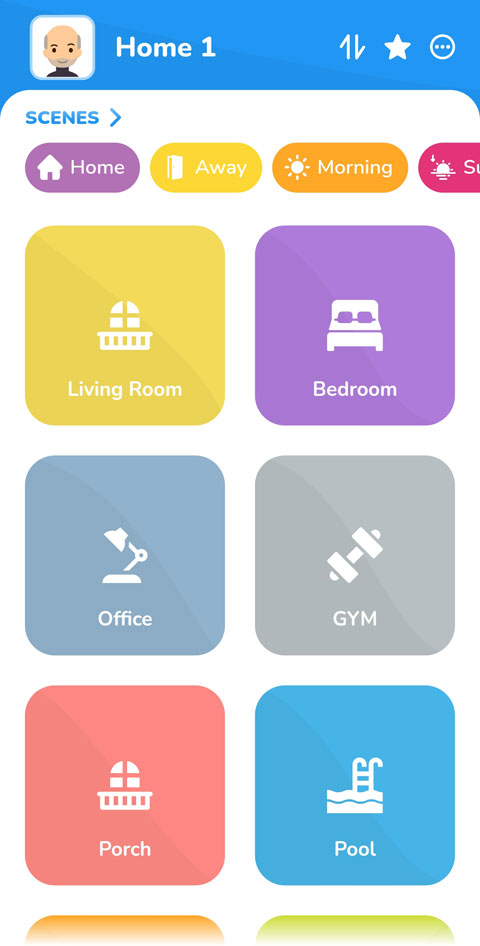
The Iotics Companion App allows you to personalize your smart home setup by configuring rooms within each location. This includes adding devices, adjusting room settings, and organizing favorites for quick access. Follow these steps to configure a location.
Navigating to Your Location’s Dashboard
From the main screen, select the location you want to configure (e.g., “Home 1”). This brings you to the Location Dashboard, where you can see all the rooms and scenes (e.g., Home, Away, Morning, Sleep) set up for that location.
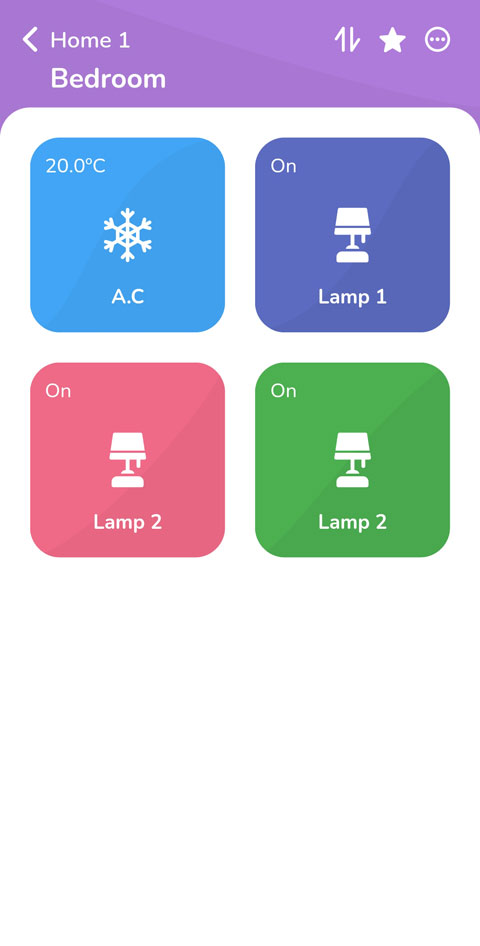
Tap on any room (e.g., “Bedroom,” “Living Room”) to view and manage devices within that specific room.
Viewing and Controlling Room Devices
Inside each room, you’ll see a panel displaying devices associated with that room, such as A.C., Lamp 1, Lamp 2.
Each device tile shows the current status (e.g., on/off) and relevant information, such as temperature for thermostats or air conditioning units.
Tap on a device tile to toggle its status or adjust settings, allowing you to control the devices directly from the app.
Room Settings and Customization
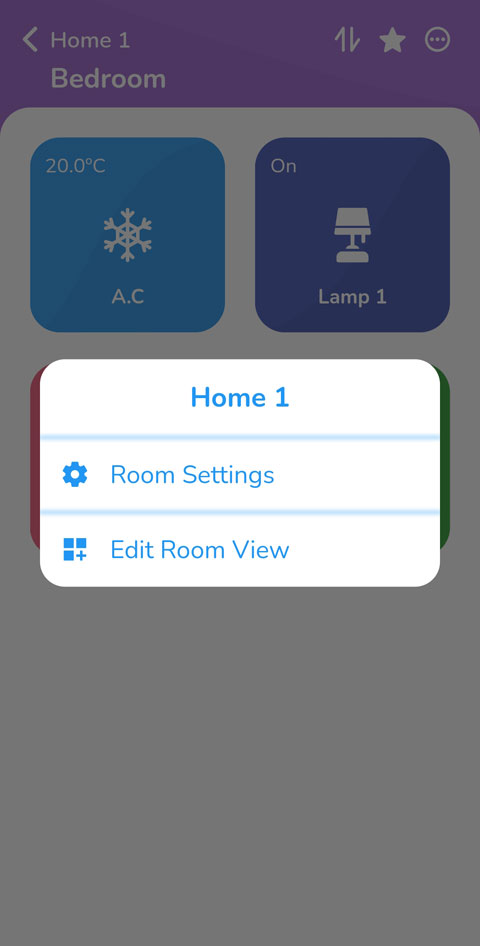
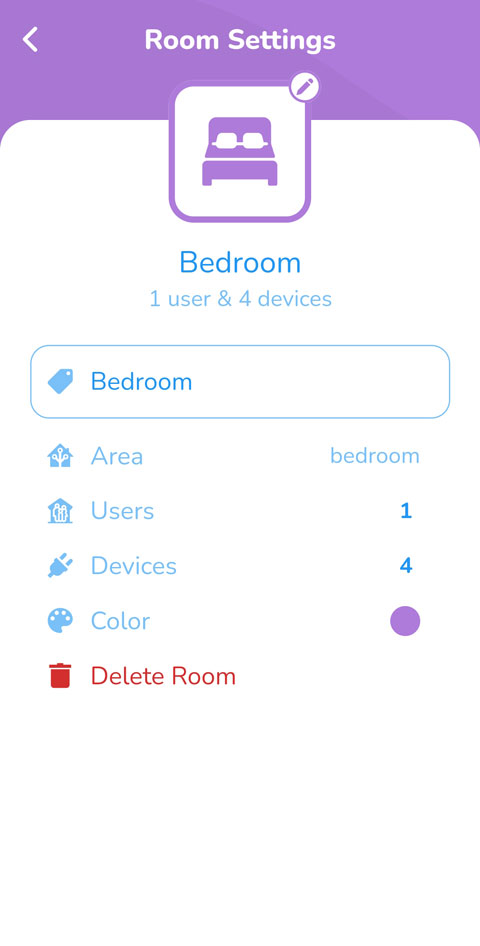
To configure room-specific settings, tap on the three-dot menu (⋮) in the top right corner of the room’s screen, and select Room Settings.
In the Room Settings panel, you can:
- Edit Room Name: Tap the pencil icon next to the room name to rename it.
- Assign Area: Specify an area for the room (e.g., bedroom, office) for easier organization.
- Manage Users and Devices: View the number of users and devices associated with the room.
- Set Room Color: Customize the room color to visually distinguish it in the dashboard.
To delete the room, scroll to the bottom and tap Delete Room (use caution as this will remove the room and all associated devices).
Editing Room Layout (Edit Room View)
To rearrange or customize the layout of devices within a room, select Edit Room View from the three-dot menu in the top right corner.
This option allows you to organize the device tiles to suit your preferences, making it easier to control frequently used devices.
Setting Favorite Rooms and Devices
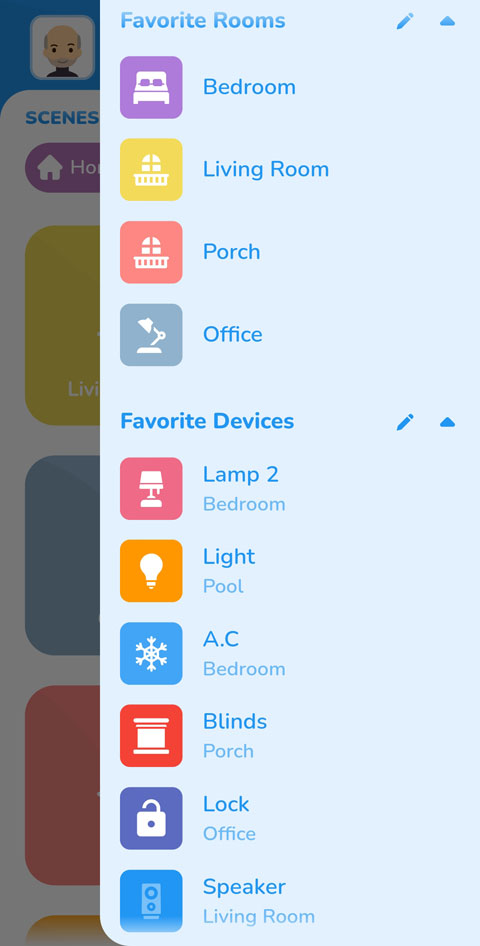
From the main Location Dashboard, swipe right to open the Favorites Panel. In the Favorites Panel, you can add or manage:
- Favorite Rooms: Tap the pencil icon to add rooms to your favorites list, allowing quick access to frequently used rooms.
- Favorite Devices: Similarly, select the pencil icon to choose devices that will appear in your favorites list for easy access.
Favorite rooms and devices are displayed in the sidebar, giving you a fast way to control essential devices or navigate to important rooms.
Configuring a device
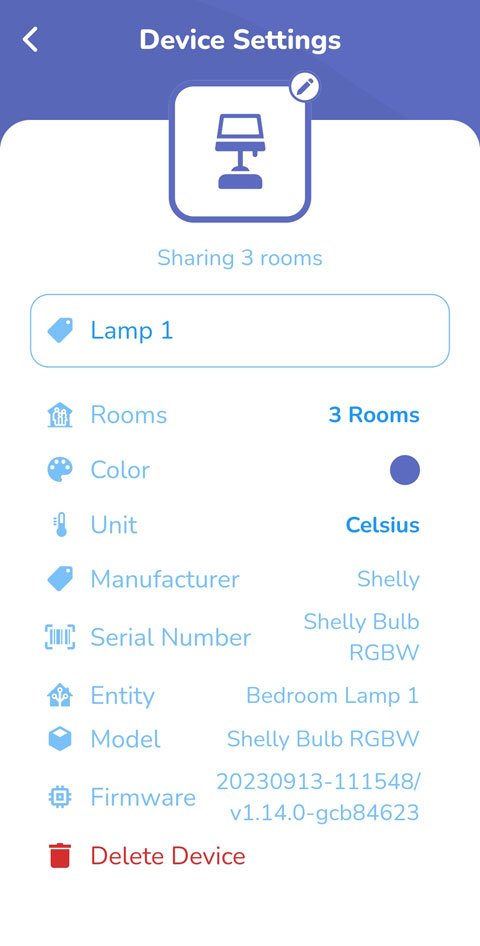
The Iotics Companion App allows you to configure individual devices within each room, giving you control over settings such as color, unit preferences, and shared room access. Follow these steps to configure a device.
Accessing Favorite Devices
From the Location Dashboard, swipe right to open the Favorites Panel where you can see Favorite Devices. Tap on a specific device, such as Lamp 1, to access the device control panel.
Controlling the Device
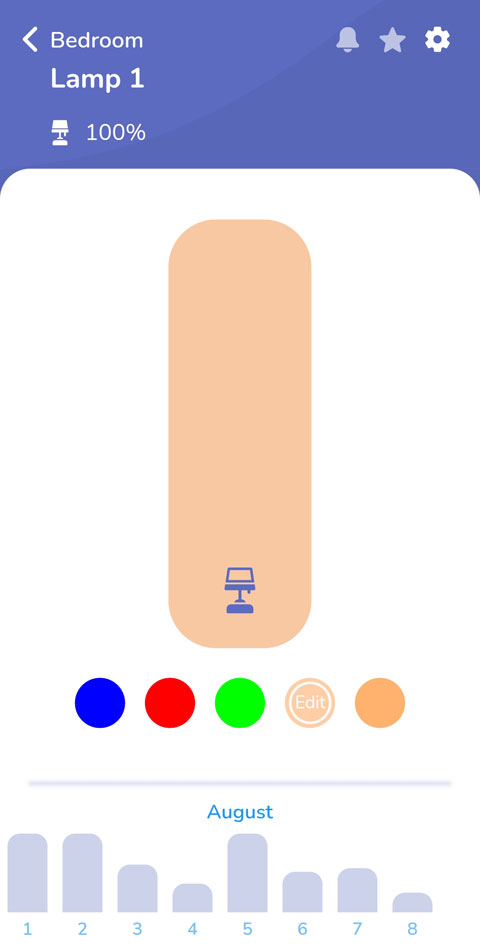
In the device control panel, you can see the current status and settings of the device.
- Adjust Device Settings: Use the slider or color options to change the brightness or color of the lamp.
- Usage History: View the usage history for the device, shown in a bar graph format, to track energy usage or activity over time.
Opening Device Settings
To further configure the device, tap on the settings icon or the device name to open the Device Settings panel.
In the Device Settings screen, you can view and edit various details, including:
- Device Name: Tap on the name field to rename the device (e.g., “Lamp 1”).
- Rooms: View or manage which rooms this device is shared with. For example, you can see if Lamp 1 is shared across multiple rooms.
- Color: Set a default color for the device, if applicable.
- Unit: Choose between Celsius or Fahrenheit for temperature-related devices.
- Device Information: View manufacturer details, model, serial number, entity name, and firmware version for easy reference.
Deleting the Device
If you need to remove the device from the system, scroll to the bottom of the Device Settings screen and tap on Delete Device. Confirm the deletion to remove the device from all associated rooms.
By configuring each device, you can customize its settings, monitor its usage, and control its behavior within your smart home. With Iotics, device management is intuitive and flexible, allowing you to tailor your smart home experience to your preferences.
Checking your devices status
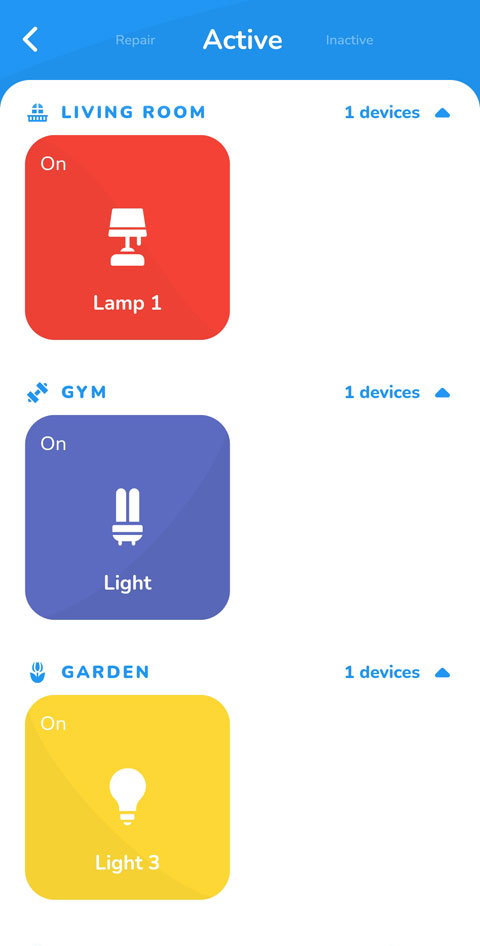
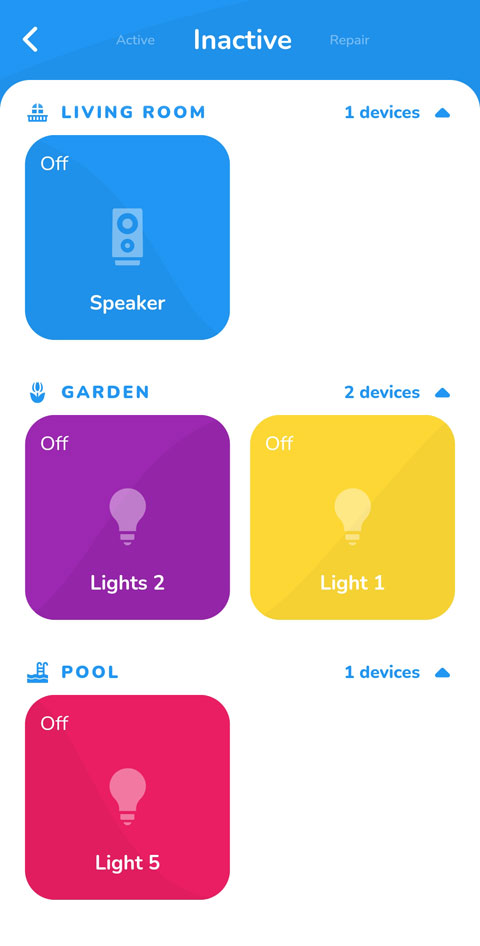
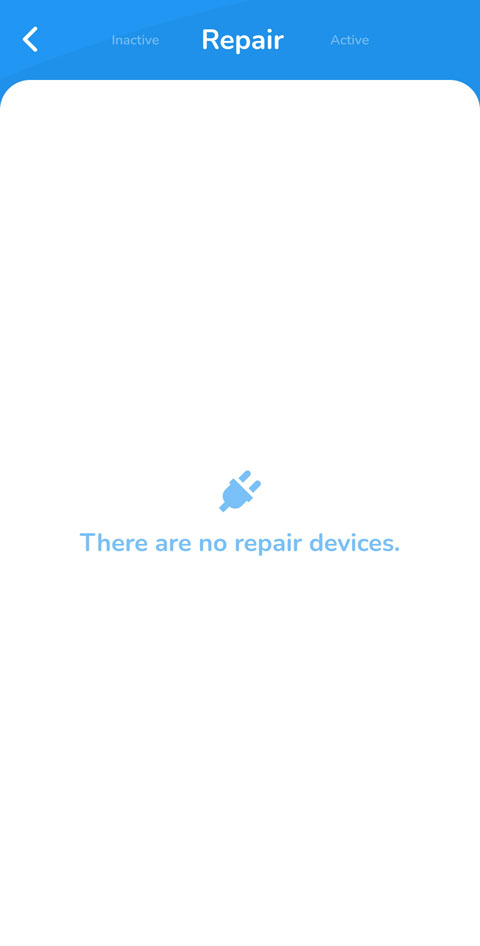
The Iotics Companion App provides an easy way to monitor the status of all your connected devices, categorized into Active, Inactive, and Repair sections. This helps you keep track of device functionality and identify any devices needing attention. Here’s how to check your devices’ status.
Accessing Device Status
From the main menu, navigate to the System or Device Status section (based on your app version) to access the device status dashboard. Here, you’ll find three tabs at the top: Active, Inactive, and Repair, which categorize devices based on their current status.
Viewing Active Devices
Tap on the Active tab to view all devices that are currently on and operational. Each device is displayed within a card, showing its name, location, and status (e.g., On).
For example:
- Lamp 1 is active in the Living Room.
- Light is active in the Gym.
- Light 3 is active in the Garden.
Viewing Inactive Devices
Switch to the Inactive tab to view devices that are currently off or not in use. Each device card here shows the device name and location, along with an Off status.
Examples:
- Speaker in the Living Room.
- Lights 2 in the Garden.
- Light 5 in the Pool.
This tab helps you monitor devices that are not currently active, which can be useful for energy management or to quickly identify any devices that are supposed to be on but are turned off.
Checking Devices in Need of Repair
Select the Repair tab to view any devices that may be experiencing issues or require maintenance.
If there are no devices needing repair, a message will display, indicating “There are no repair devices.”
This section is helpful for identifying devices that may need troubleshooting or replacement, allowing you to address potential issues before they affect your smart home setup.
The categorized view helps you stay informed on what’s active, inactive, or in need of repair, so you can efficiently manage your devices and maintain a functional smart home environment.
Checking notifications and history

Notifications
The Notifications section in the Iotics Companion App keeps you updated on important events and changes within your smart home environment. Here’s how to access and manage notifications:
Accessing Notifications:
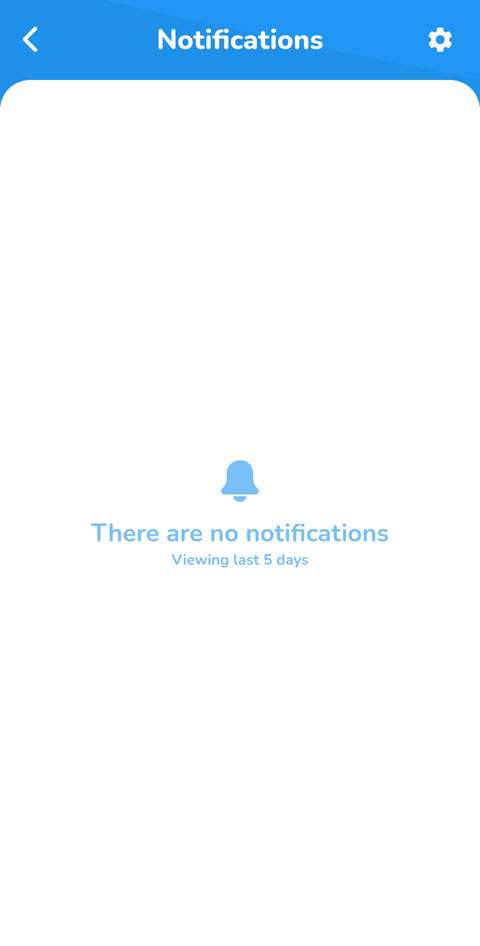
- To view recent notifications, tap the bell icon in the top-right corner of the main screen.
- This opens the Notifications screen, which displays a log of recent alerts and updates.
Viewing Notifications:
- Notifications provide a summary of key events, such as device status changes, automation triggers, or alerts from specific rooms.
- By default, the app displays notifications from the last five days, helping you stay informed about recent activity.
- If there are no notifications, the screen will display a message, “There are no notifications,” indicating that no recent events require your attention.
Tip: Regularly check your notifications to ensure that all devices and automations are functioning correctly, and to stay informed about any changes or alerts within your smart home setup.





History
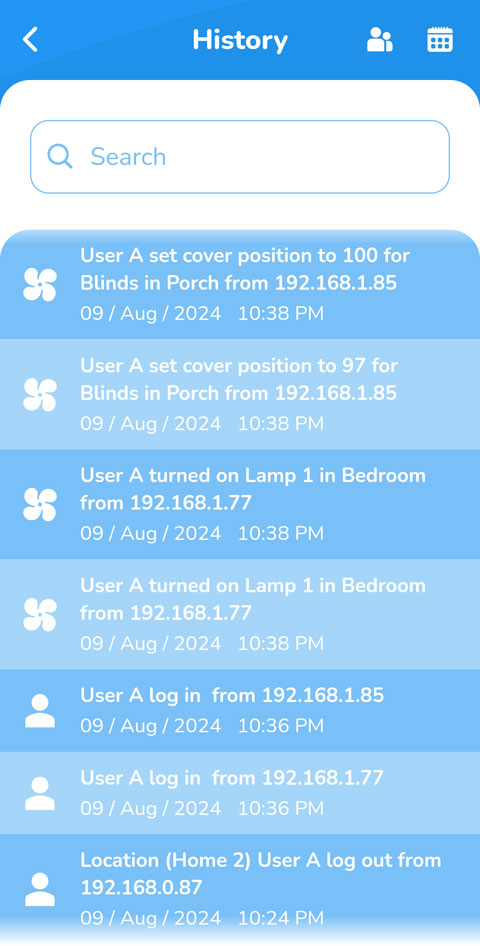
The History section in the Iotics Companion App provides a comprehensive log of past actions and events within your smart home. This feature is useful for tracking usage patterns, troubleshooting issues, and gaining insights into device interactions.
Accessing History:
- From the main menu, select History to open the activity log.
- The History section displays a chronological list of events, including device control actions, user logins, and automation triggers.
Filtering by User:
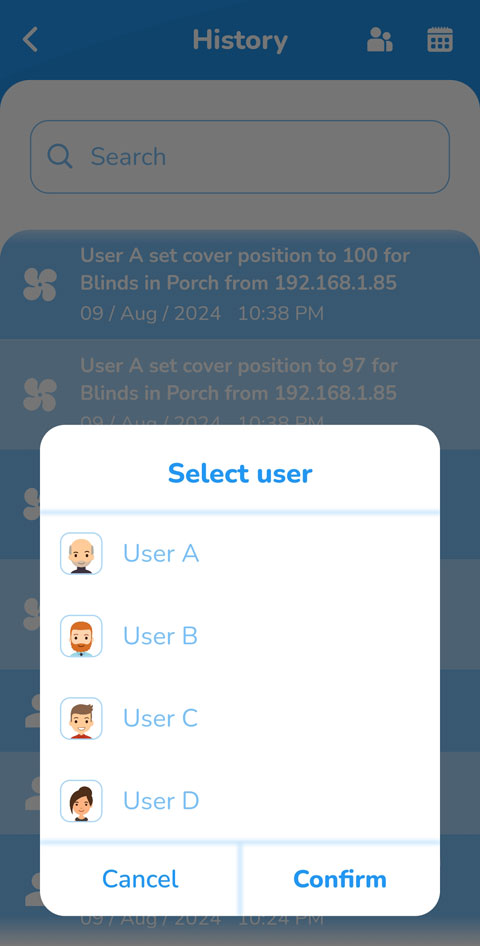
- To view the history for a specific user, tap the user filter icon at the top of the screen.
- Select the desired user from the list (e.g., User A, User B) and confirm your choice to filter the activity log for that user only.
- This feature is particularly helpful for monitoring individual user actions or ensuring compliance with access permissions.
Filtering by Date:
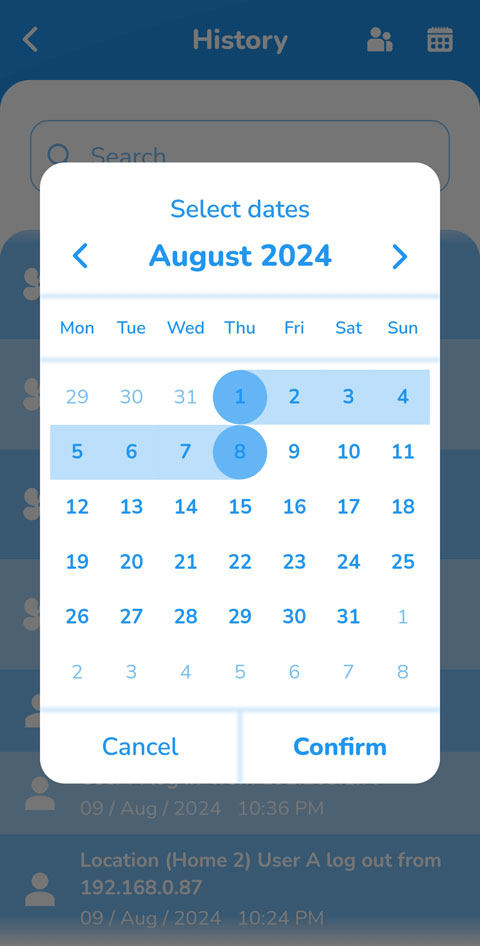
- To narrow down events by date, tap the calendar icon at the top of the screen.
- Select a date range to view activity from specific days, and confirm your choice to update the log.
- Date filtering allows you to easily locate events from a specific period, which is useful for reviewing recent or past actions in detail.
Searching Events:
- Use the search bar at the top of the History screen to find specific events.
- Enter keywords, such as a device name or action type, to quickly locate relevant entries.
Insight: The History feature in the Iotics Companion App gives you an in-depth look at how your smart home is used, helping you analyze patterns, identify potential issues, and manage user activities.
Configuring Scenes & Automations
Selecting a device schedule






The Iotics Companion App allows you to automate device actions by creating customized schedules. This feature enables devices to turn on, off, or perform specific actions at predefined times, making it easy to automate your smart home.
Accessing Automations:
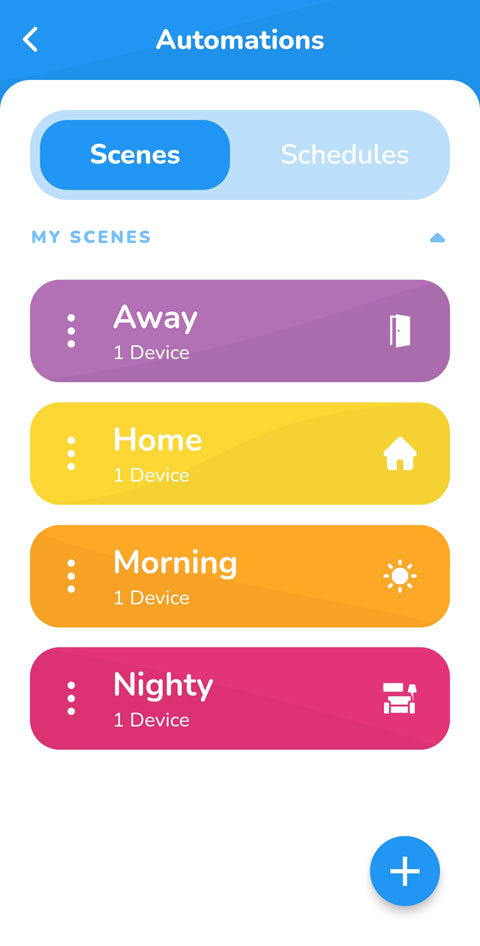
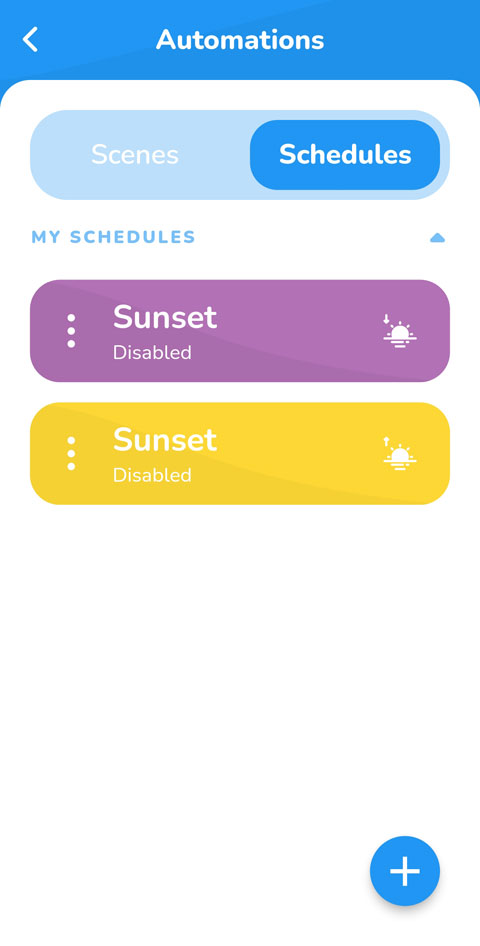
From the main menu, navigate to Automations. You’ll see two tabs: Scenes and Schedules.
- Select Scenes to view or create scenes.
- Select Schedules to view or create schedules for your devices.
Creating and activating scenes:
Scenes can be imported from home assistant or created locally, they are a saved state of one or more entities that can be instigated with a single service call. If you have scenes configured, they will be listed as shown in the screenshot above.
To create a scene, tap the + button and follow the on screen instructions.
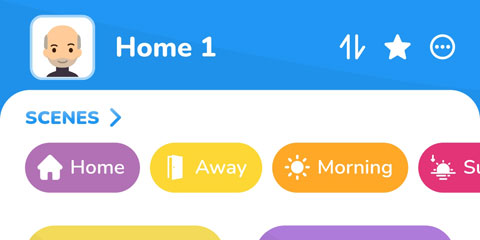
Scenes can then be activated from the home page, allowing you to control the associated devices with a single click:

Creating a New Schedule:
If you have schedules configured, they will be listed as shown in the screenshot above.
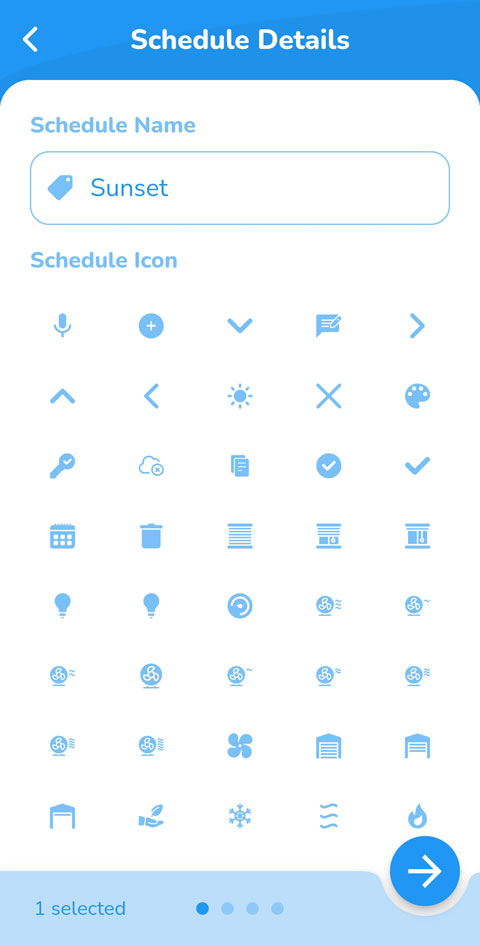
- Tap the + button to start creating a new schedule.
- In the Schedule Details screen, enter a name for your schedule (e.g., “Sunset”).
- Choose an icon that best represents the schedule (e.g., sun icon for sunset).
Selecting Devices for the Schedule:
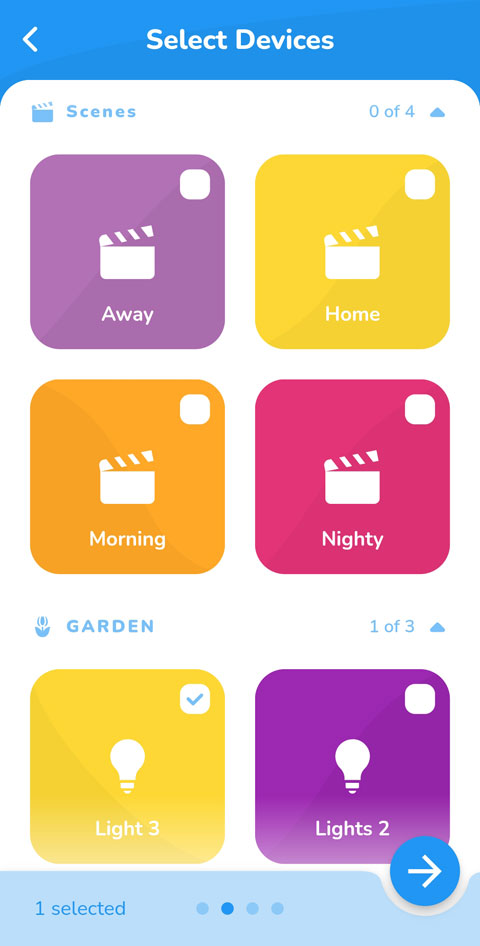
After naming the schedule, tap to proceed to the Select Devices screen. Choose the devices you want to include in this schedule. You can select individual devices or scenes. Once you’ve selected the devices, tap the arrow button to continue.
Selecting device actions and triggers
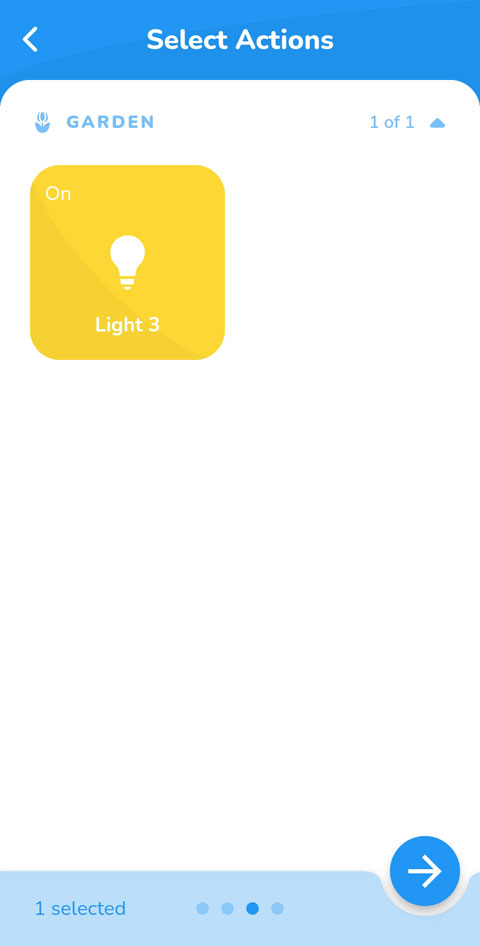

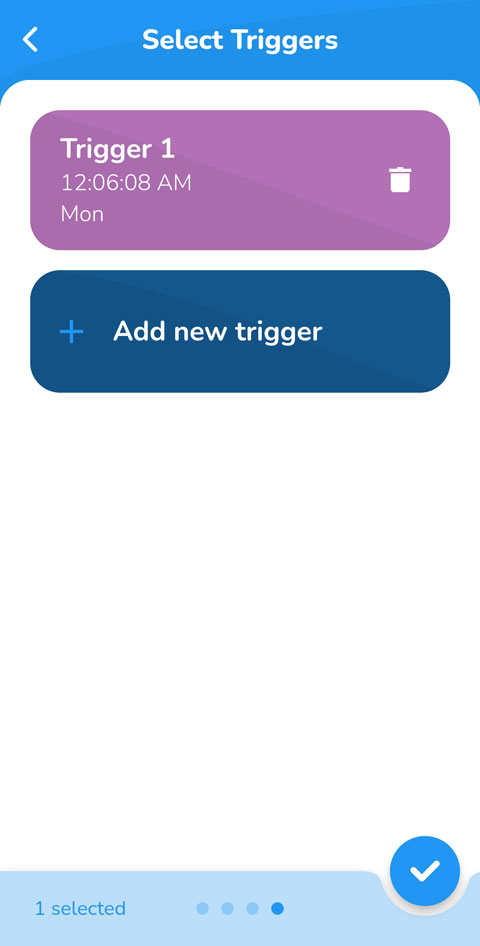

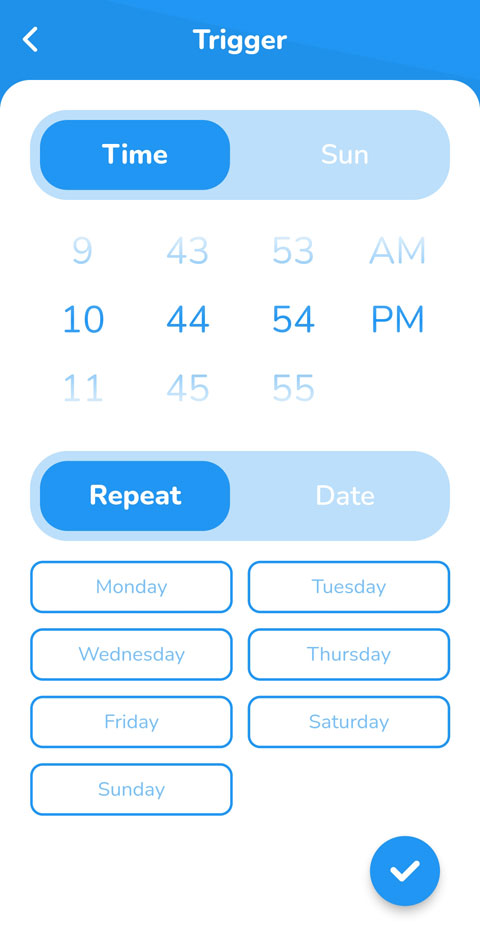

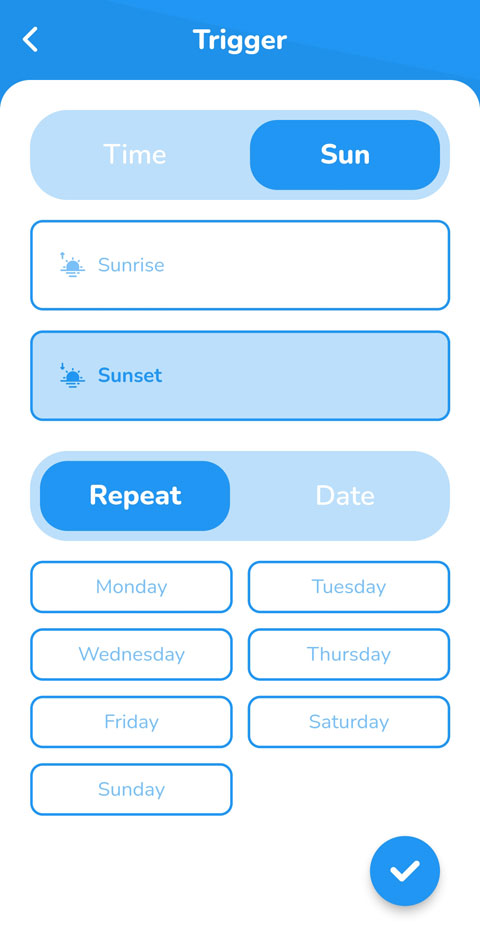

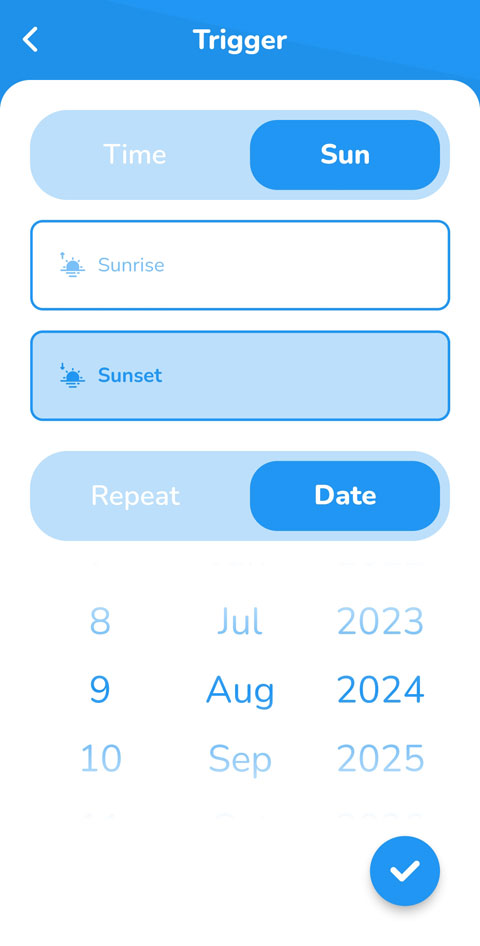

With the Iotics Companion App, you can configure specific actions and triggers to define when and how each device operates within a schedule. This allows for precise control over automation settings, such as turning lights on at sunset or activating devices at certain times.
Defining Device Actions:
- After selecting devices, you’ll proceed to the Select Actions screen.
- For each device, specify the action it should take (e.g., turn on/off, adjust brightness). This enables you to set customized actions for each device based on your preferences.
Adding Triggers:
Next, configure triggers that will activate the schedule. Tap Add new trigger to create a new trigger. You can set triggers based on:
- Time: Choose a specific time for the action to occur, such as 7:00 PM.
- Sunrise/Sunset: Schedule actions based on sunrise or sunset times for natural light adjustments.
- Repeat: Select days for the trigger to repeat, such as weekdays or weekends.
Setting the Trigger:
Customize the trigger by selecting whether it should be a one-time event or repeated on certain days. You can also set specific dates for the action to run, adding more flexibility to your schedule. Once you’ve configured the triggers, confirm your settings to activate the automation.
Checking system information


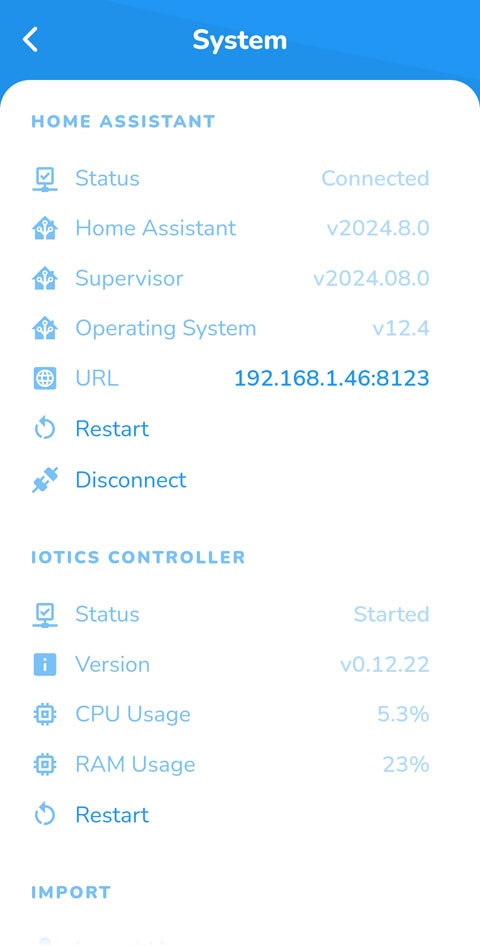

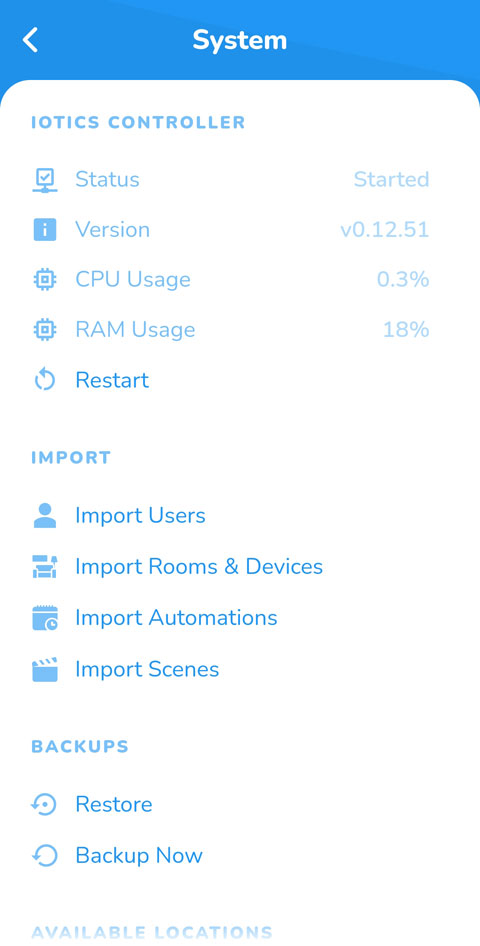

The System section in the Iotics Companion App provides essential details about the status and performance of both Home Assistant and the Iotics Controller. This section helps you monitor system health, manage backups, and import configurations.
Accessing the System Information:
From the main menu, tap on System to access detailed information about your Home Assistant setup and the Iotics Controller.
Home Assistant Status:
In the Home Assistant section, you can view:
- Status: Indicates whether Home Assistant is connected.
- Home Assistant Version: Displays the current version of Home Assistant in use (e.g., v2024.8.0).
- Supervisor and Operating System: Shows the versions of the Home Assistant Supervisor and operating system.
- URL: Provides the IP address and port for accessing Home Assistant.
- Restart and Disconnect options: Allows you to restart or disconnect Home Assistant directly from the app.
Iotics Controller Status:
The Iotics Controller section displays information on the performance and status of the Iotics system, including:
- Status: Shows whether the controller is currently running.
- Version: Indicates the current version of the Iotics Controller (e.g., v0.12.22).
- CPU and RAM Usage: Provides real-time data on CPU and RAM usage to monitor resource consumption.
- Restart: Option to restart the Iotics Controller if necessary.
Import Options:
The Import section allows you to import existing configurations to streamline setup and management:
- Import Users: Brings in user profiles and permissions.
- Import Rooms & Devices: Imports room setups and associated devices.
- Import Automations: Imports predefined automation settings.
- Import Scenes: Imports scene configurations for quick access to specific environment settings.
Backup Management:
The Backups section lets you manage system backups to ensure your configurations are safe and restorable:
- Restore: Restore from a previous backup if needed.
Backup Now: Manually create a backup of your current settings.
Configuring a theme


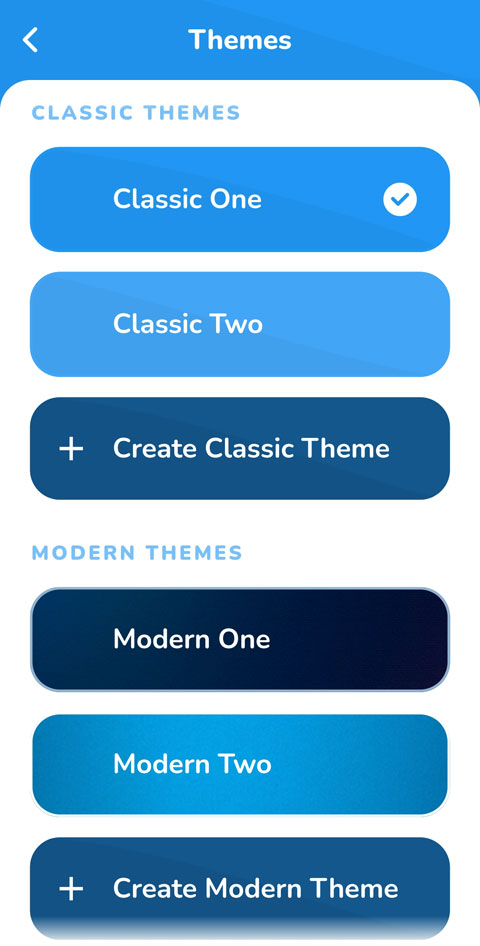

The Iotics Companion App allows you to personalize your interface by selecting or creating themes. With options for both classic and modern themes, you can customize the look and feel of the app to suit your preferences.
Accessing the Themes Menu:
From the main menu, select Themes to open the theme configuration screen. Here, you’ll see theme options categorized into Classic Themes and Modern Themes.
Selecting a Predefined Theme:
Under each category, you’ll find a Default theme and other predefined options (e.g., Classic Theme under Classic Themes).
Tap on a theme to preview it and select it as your current theme. A checkmark will appear to indicate the active theme.
Creating a Custom Theme:
If you want a more personalized look, tap Create Classic Theme or Create Modern Theme based on the style you prefer.
Follow the prompts to customize elements such as colors, fonts, and background settings. Once finished, save the theme with a unique name for easy identification.
Switching Between Classic and Modern Themes:
You can switch between classic and modern designs anytime by selecting a theme from either category. This allows you to quickly adapt the app’s appearance to different preferences or moods.
Tip: Experiment with different themes to find the look that best enhances your user experience.